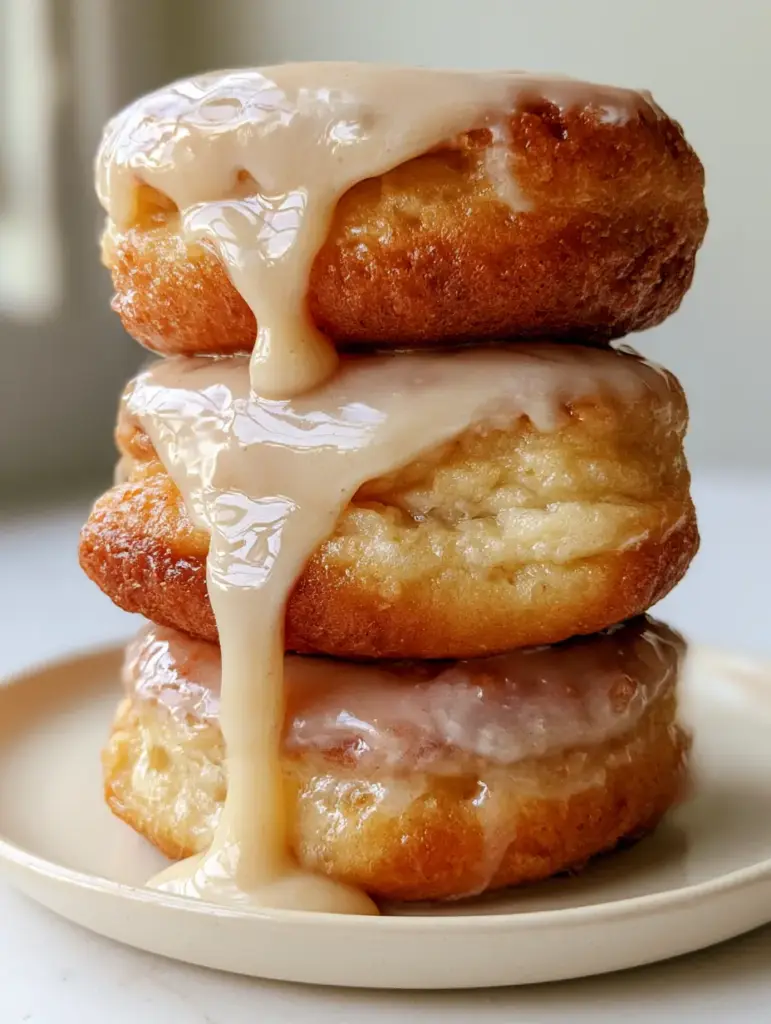
There is nothing quite like the aroma of fresh yeast dough rising in a warm kitchen, especially when it is destined to become these spectacular maple donut bars. If you have been searching for that elusive, bakery-style pastry that combines a pillowy, airy interior crumb with a thick, glass-like maple glaze, you have arrived at your destination. These bars are not just a breakfast treat; they are a masterclass in texture and sweet, woodland flavor.
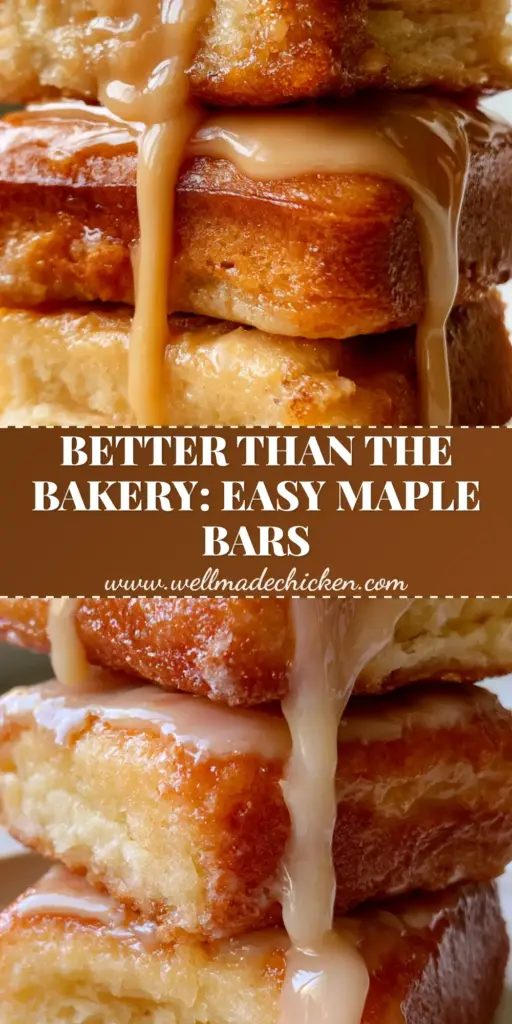
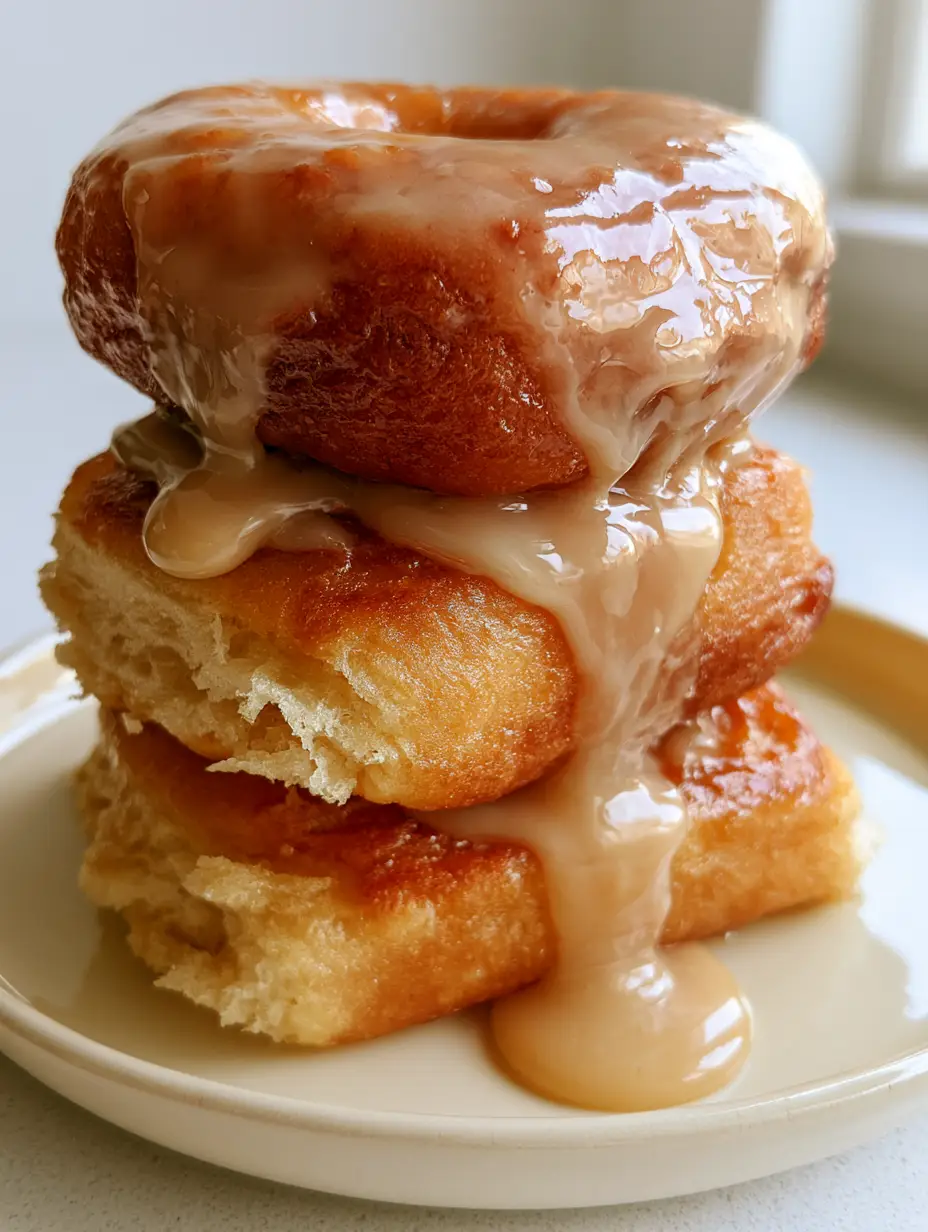
Inspired by the classic Long John but elevated through artisanal baking techniques, these maple donut bars offer a sophisticated alternative to the greasy, deep-fried versions found at local chains. By focusing on a high-hydration yeast dough and a precision-temperature maple coating, we achieve a result that is both lighter and more flavorful. The visual of a heavy, smooth ribbon of glaze cascading down a golden-brown side is enough to make anyone reach for a second helping.
Whether you are hosting a weekend brunch or simply want to master the art of the perfect soft-baked pastry, this guide will walk you through every sensory cue. From the moment the yeast blooms to the final glossy drip, we ensure your kitchen produces results that look like they stepped out of a professional food photography session. Let’s dive into the science and soul of these incredible maple donut bars.
Why These Soft-Baked Maple Pastries Stand Out
- Unmatched Pillowy Texture: The yeast dough is engineered for maximum airiness, creating a soft, cloud-like crumb that melts in your mouth.
- Ultra-Glossy Maple Finish: Our specific glaze ratio ensures a thick, opaque coating with a mirror-like sheen that catches the light perfectly.
- Sophisticated Flavor Profile: By utilizing real maple syrup and a hint of vanilla, the sweetness is complex rather than cloying.
- Baked, Not Fried: You get all the satisfaction of a traditional donut with a cleaner finish and significantly less mess in the kitchen.
Pantry Essentials for the Fluffiest Yeast Dough
To achieve the golden-brown baked yeast dough required for authentic maple donut bars, the quality of your ingredients is paramount. Every component plays a structural role in building that airy interior crumb. Using room temperature ingredients is not just a suggestion; it is a scientific necessity for proper yeast fermentation.
Whole Milk (240ml / 1 cup): The fat content in whole milk provides the richness needed for a tender crumb. When warmed to 110°F (43°C), it serves as the perfect incubator for the yeast to wake up and start producing carbon dioxide.
Active Dry Yeast (7g / 2.25 tsp): This is the engine of your donut. It creates the tiny air pockets that define an airy interior crumb, ensuring the bars aren’t dense or heavy once baked.
Granulated Sugar (50g / 1/4 cup): Beyond adding sweetness, sugar tenderizes the gluten and helps the crust achieve that specific golden-brown hue through the Maillard reaction. It also feeds the yeast, accelerating the rising process.
Unsalted Butter (56g / 4 tbsp): Melted and slightly cooled, butter coats the flour proteins, preventing excessive gluten development. This results in a “soft-baked” texture rather than a chewy, bread-like one.
Bread Flour (435g / 3.5 cups): While all-purpose flour works, bread flour contains more protein, which provides the necessary structure to hold those large air bubbles. This is the secret to a bar that stands tall and proud on a ceramic plate.
Large Egg (1 unit): An egg adds structure and color. The lecithin in the yolk acts as an emulsifier, binding the fats and liquids into a smooth, cohesive dough.
Fine Sea Salt (5g / 1 tsp): Salt is the regulator. It controls the yeast’s growth rate and enhances the subtle flavors of the maple and butter, ensuring the pastry isn’t one-dimensionally sweet.
Foundational Tools for Bakery-Quality Results
You don’t need a commercial bakery to make elite maple donut bars, but a few specific tools will make the process seamless. A stand mixer equipped with a dough hook is highly recommended to achieve the smooth, elastic consistency required for a pillowy rise without overworking your arms.
A heavy-duty baking sheet lined with high-quality parchment paper ensures the bottoms of the bars don’t brown too quickly. For the glaze, a wide, shallow bowl is essential for the “dipping” technique, which creates those iconic smooth glaze drips. Finally, a wire cooling rack is non-negotiable; it allows air to circulate around the baked dough, preventing the bottom from becoming soggy as the pastries cool.
The Science of Creating the Perfect Airy Crumb
Step 1: The Activation Phase
In the bowl of your stand mixer, combine the warm milk (110°F/43°C) and a pinch of the sugar. Sprinkle the active dry yeast over the top and let it sit for about 5-10 minutes. You are looking for a frothy, bubbly head to form—this is the visual cue that your yeast is alive and ready to work. If it doesn’t foam, discard and start over with fresh yeast.
Step 2: Mixing the Enriched Dough
Add the remaining sugar, melted butter, egg, and salt to the yeast mixture. Whisk gently to combine. Switch to the dough hook and begin adding the bread flour one cup at a time on low speed. Once the dough starts to pull away from the sides of the bowl, increase the speed to medium and knead for 5-7 minutes. The dough should feel tacky but not sticky, and look smooth and elastic.
Step 3: The First Rise (Bulk Fermentation)
Place the dough in a lightly greased bowl and cover it with a damp cloth or plastic wrap. Place it in a warm, draft-free spot. Let it rise until it has doubled in size, usually about 60-90 minutes. This is where the flavor develops and the interior structure begins to form. While you wait, you might want to check out our apple cinnamon overnight oats for an easier weekday breakfast alternative.
Step 4: Shaping the Bars
Gently punch down the risen dough to release excess gas. Turn it out onto a lightly floured surface and roll it into a rectangle about 1/2 inch (1.25cm) thick. Using a pizza cutter or a sharp knife, cut the dough into rectangular bars (roughly 2×5 inches). Place them on your prepared baking sheet, leaving at least 2 inches of space between each bar to allow for expansion.
Step 5: The Second Rise and Bake
Cover the bars loosely and let them rise again for 30-45 minutes. They should look puffy and “marshmallowy.” Preheat your oven to 350°F (175°C). Bake for 12-15 minutes. Watch for the visual cue: the tops should be a light golden-brown, and the bars should feel springy to the touch. Remove them from the oven and transfer to a wire rack immediately to cool completely.
Crafting the Opaque Maple Glaze Ribbon
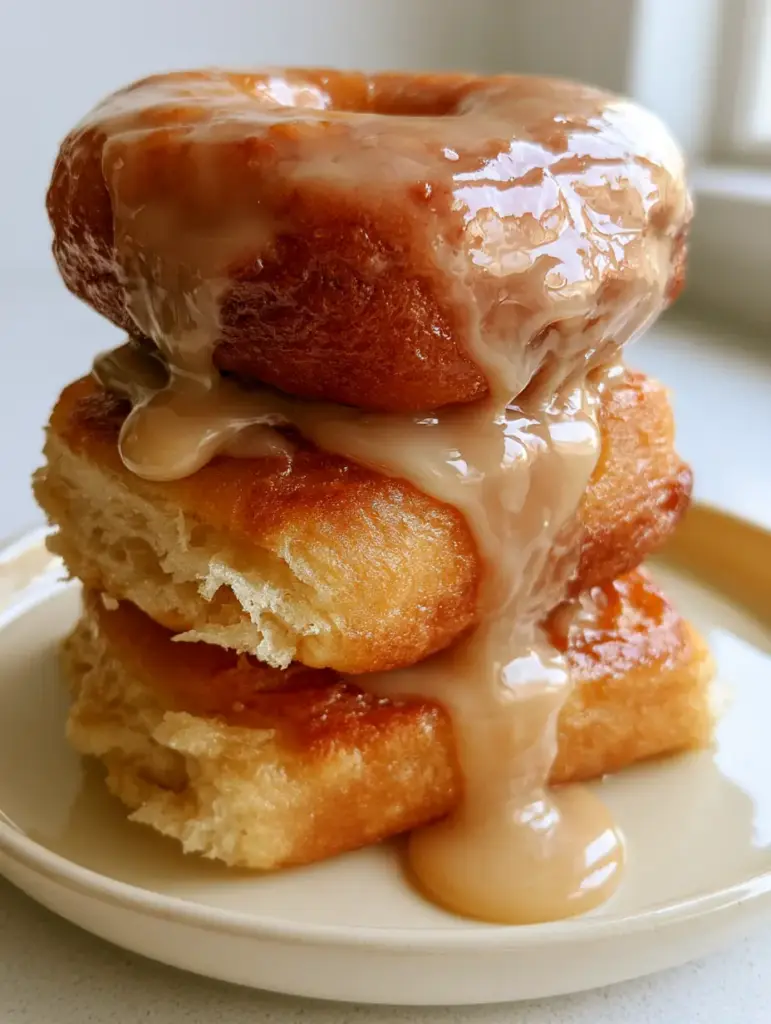
The crowning glory of maple donut bars is the glaze. To achieve that thick, opaque, and ultra-glossy finish, we use a combination of sifted powdered sugar, pure maple syrup, and a touch of melted butter for shine. If the glaze is too thin, it will soak into the dough; if it’s too thick, it won’t produce those beautiful ribbons.
In a medium bowl, whisk together 2 cups (240g) of sifted powdered sugar, 1/4 cup (60ml) of pure maple syrup, 2 tbsp (30g) of melted butter, and 1 tsp of maple extract. If the mixture is too stiff, add milk one teaspoon at a time until it reaches a “slow-flow” consistency. When you lift the whisk, the glaze should fall back into the bowl in a thick ribbon that holds its shape for a second before disappearing.
Dip the top of each cooled bar into the glaze, letting the excess drip off for a moment before flipping it right-side up. For that “handheld smartphone photo” look, let the glaze naturally cascade down the sides. If you love maple but want something with a bit more crunch, consider our bourbon maple bacon cinnamon rolls for your next baking project.
Expert Tips for Bakery-Style Success
- Sift Your Sugar: Always sift your powdered sugar before making the glaze. Even small lumps will ruin the “glass-like sheen” described in the visual prompt.
- Temperature Control: Ensure the donut bars are completely cool before glazing. If they are even slightly warm, the glaze will melt and become transparent rather than thick and opaque.
- The “Finger Poke” Test: During the second rise, gently poke a bar. If the indentation fills back slowly, they are ready to bake. If it springs back instantly, they need more time.
- Real Syrup Matters: Use Grade A Dark Amber maple syrup for the best flavor depth. Pancake syrup (corn syrup based) will not provide the same authentic taste or setting properties.
Serving and Pairing Suggestions
These maple donut bars are best served fresh, ideally within a few hours of glazing when the contrast between the soft dough and the setting glaze is at its peak. Place a stack of three on a minimalist ceramic plate to mimic the high-end lifestyle aesthetic. The neutral background helps the golden hues of the pastry pop.
Pair these sweet treats with a strong, black coffee or a cold glass of milk to balance the richness. If you are looking for a savory counterpoint to serve at a brunch, our cheesesteak stuffed garlic bread makes for a surprisingly popular addition to a diverse spread. For a lighter pairing, explore our variety of juice recipes to find a refreshing citrus blend.
Storage, Reheating, and Freezing Advice
While these are best eaten Day 1, you can store leftovers in an airtight container at room temperature for up to 2 days. Avoid refrigerating them, as the cold air will dry out the airy interior crumb and cause the glaze to weep. If the glaze becomes slightly sticky, a quick 5-second burst in the microwave can soften the dough again, though the glaze will lose its crystalline sheen.
To freeze, it is best to freeze the unglazed baked bars. Wrap them individually in plastic wrap and place in a freezer bag for up to 2 months. Thaw at room temperature and apply a fresh batch of glaze just before serving to maintain that professional, glossy look.
Frequently Asked Questions
Yes! This recipe is specifically designed for baking. The enriched yeast dough produces a soft-baked, pillowy texture that is lighter than fried versions while maintaining a classic airy crumb.
Absolutely. You can perform the first rise in the refrigerator overnight. The cold fermentation actually develops more flavor. Just let the dough sit at room temperature for 30 minutes before shaping the bars the next morning.
The secret is the ratio of sifted powdered sugar to liquid and the addition of a little melted butter. Ensure your bars are completely cool before dipping to prevent the glaze from thinning out and becoming translucent.
Store them in an airtight container at room temperature for up to 2 days. Do not refrigerate, as the moisture will cause the glossy maple glaze to become sticky and the dough to turn stale quickly.
This is usually due to inactive yeast or liquid temperatures. Ensure your milk is between 105°F and 115°F. If it’s too hot, it kills the yeast; too cold, and it won’t activate. Also, check the expiration date on your yeast packet.
The Ultimate Recipe for Maple Donut Bars
Maple Donut Bars: The Ultimate Soft-Baked Yeast Pastry Recipe
Ingredients
Equipment
Method
- Combine warm milk, a pinch of sugar, and yeast in a mixer bowl. Let stand for 5-10 minutes until frothy.
- Add remaining dough ingredients. Use the dough hook to knead on medium speed for 5-7 minutes until smooth and elastic.
- Cover and let rise in a warm spot for 60-90 minutes until doubled in size.
- Roll dough to 1/2 inch thickness. Cut into 2x5 inch rectangles. Place on parchment-lined sheet.
- Cover and let rise for 30-45 minutes until puffy.
- Bake at 350°F (175°C) for 12-15 minutes until golden-brown. Cool completely on a rack.
- Whisk glaze ingredients until smooth. Dip cooled bars into the glaze, allowing a smooth drip to form down the sides.
Notes
Sift the powdered sugar to avoid lumps in the final ribbon drip.
Conclusion: Master the Art of the Maple Drip
Creating professional-grade maple donut bars at home is a rewarding journey into the heart of yeast baking. By following these steps, you’ve mastered the balance of a pillowy dough and a mirror-finish glaze. The satisfaction of seeing that heavy, smooth ribbon of maple icing cascade down a perfectly baked pastry is a culinary win like no other.
We would love to see your creations! Share your photos on social media and be sure to tag us. For more sweet inspiration and to save this recipe for your next weekend bake, follow us and pin this to your favorite boards on Pinterest. Happy baking!