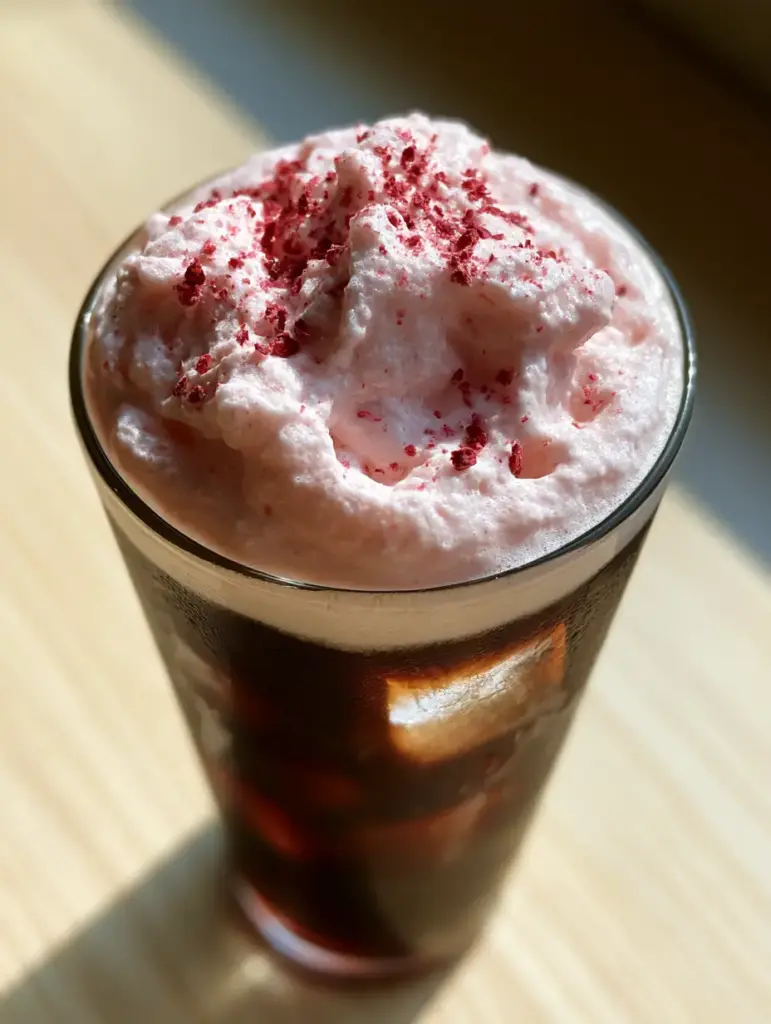
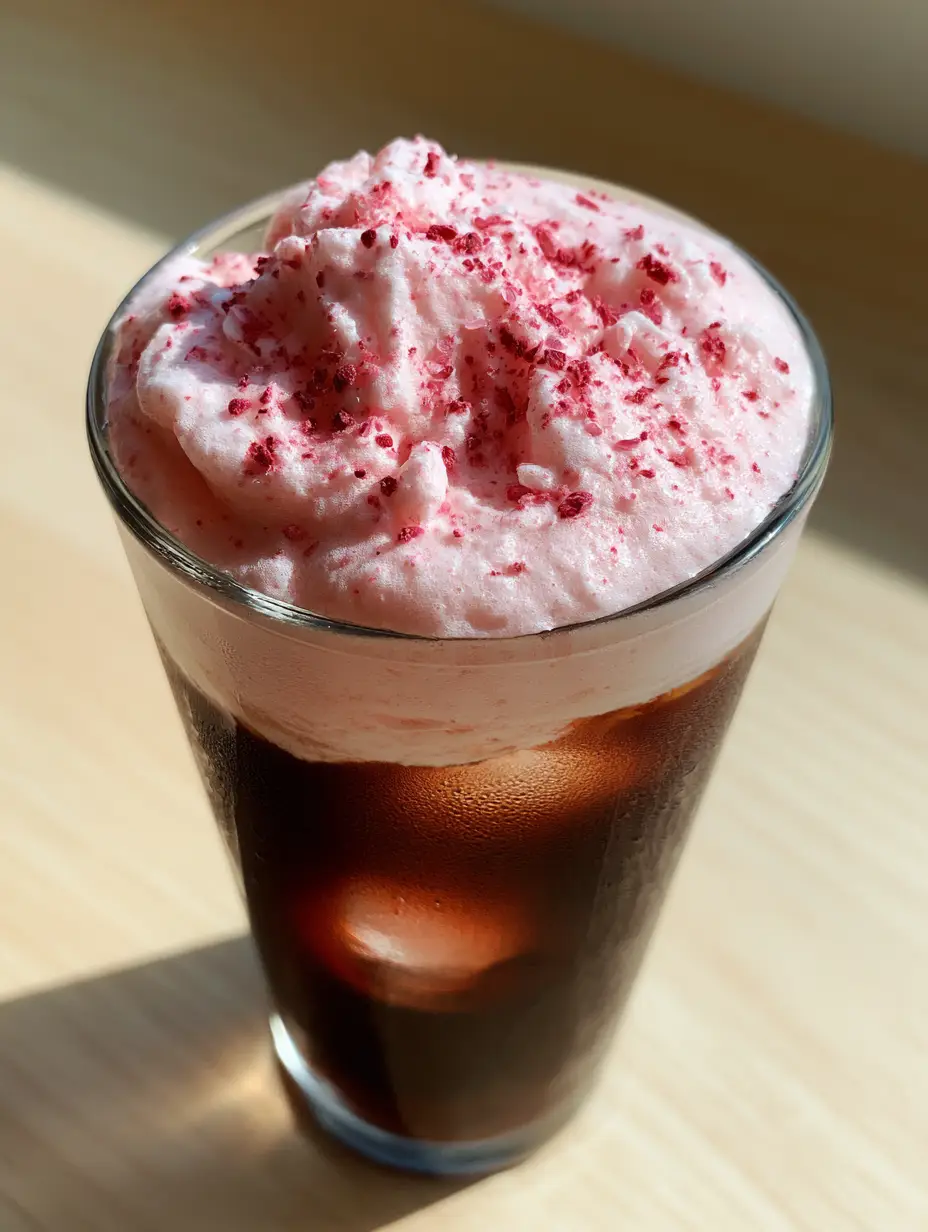
There is nothing quite as visually arresting as the contrast between a deep, dark glass of cold brew and a voluminous, pastel pink cloud of Strawberry Cold Foam. If you have ever stared longingly at the vibrant layers of a specialty coffee house beverage, you know that the magic lies in the texture.
This recipe isn’t just about adding flavor; it is about engineering a stiff, velvety foam that sits proudly atop your drink without immediately dissolving. We are going to achieve that iconic “stiff peak” look using professional culinary techniques and high-quality ingredients.
Whether you are looking to brighten up your morning routine or impress guests at a brunch, this Strawberry Cold Foam delivers a sensory experience that rivals any professional barista’s creation. Let’s dive into the science of the perfect pink pour.
Why This Pastel Pink Topper is a Total Game Changer
- Structural Integrity: Unlike thin creamers, this foam is whipped to a dense, velvety consistency that creates a distinct separation between the dark coffee and the pink cream.
- Natural Vibrancy: We use real strawberry elements to achieve that soft pastel pink hue, avoiding the artificial aftertaste of low-quality syrups.
- Sensory Contrast: The bitterness of the dark cold brew coffee perfectly balances the sweet, fruity brightness of the aerated strawberry cream.
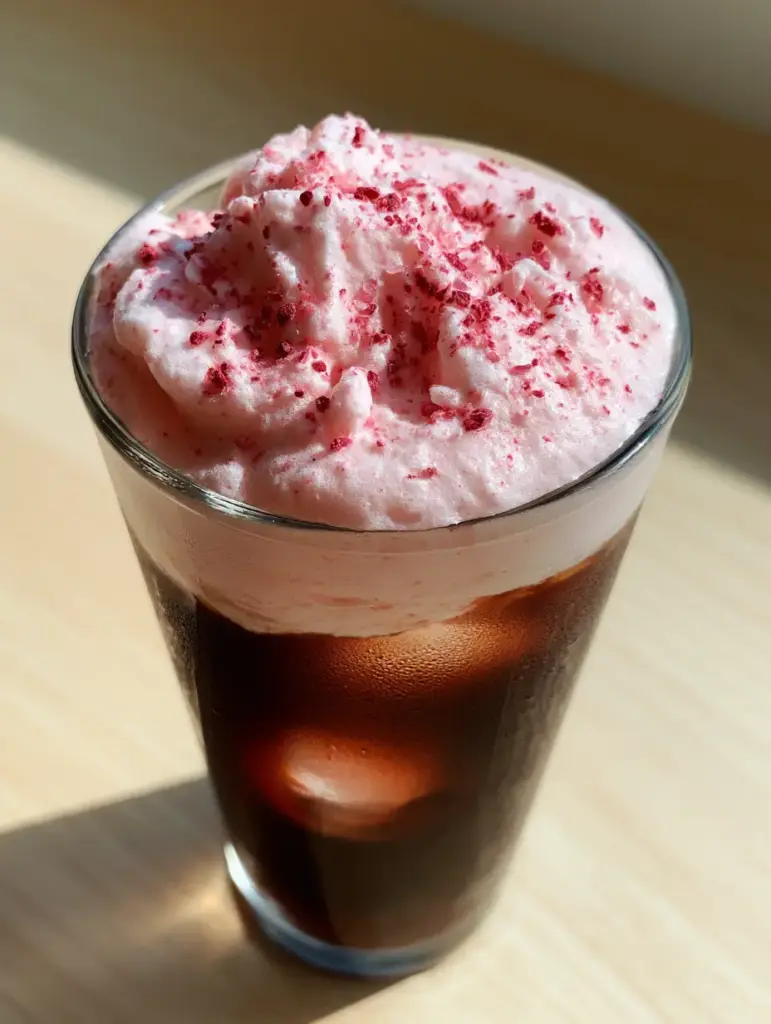
- Visual Perfection: From the clear square ice cubes to the deep red freeze-dried strawberry powder, every element is designed for maximum aesthetic impact.
The Anatomy of Stiff Strawberry Peaks: Essential Ingredients
Creating a Strawberry Cold Foam that holds its shape requires a specific ratio of fats and proteins. We are building a stable emulsion that can withstand the weight of its own garnish.
Heavy Whipping Cream (1/2 cup / 120ml): This is the foundation of our foam’s structure. The high fat content is what allows the mixture to trap air and form those iconic stiff peaks that sit prominently on the coffee.
2% or Whole Milk (1/4 cup / 60ml): While cream provides the thickness, milk provides the protein needed for bubbles. Combining the two ensures the foam is light enough to sip but dense enough to stay layered.
Strawberry Syrup (2 tbsp / 30ml): Choose a high-quality syrup or a reduced strawberry puree. This provides the primary flavor profile and the initial soft pink coloration to the mixture.
Freeze-Dried Strawberry Powder (1 tsp / 2g): We use this both inside the foam for intense flavor and as a dusting on top. It adds those beautiful tiny specks of deep red visible in the final presentation.
Pinch of Sea Salt: A tiny amount of salt acts as a flavor enhancer. It cuts through the sweetness and makes the strawberry flavor pop against the dark coffee base.
Dark Cold Brew Coffee (12 oz / 355ml): The dark, concentrated nature of cold brew provides the perfect canvas. If you’re looking for more drink inspiration, check out our other refreshing drink recipes.
The Frothing Arsenal: Equipment for Professional Results
To achieve the macro-photography-ready results seen in the visuals, you need the right tools to aerate the dairy properly.
Handheld Milk Frother (Electric Wand): This is the most efficient way to control the density of your Strawberry Cold Foam. It allows you to target specific areas of the cream to build volume quickly.
High-Powered Blender (Optional): If you are making a larger batch, a blender can create a very uniform, dense texture. However, for a single serving, the wand is superior for creating peaks.
Clear Highball Glass: To appreciate the condensation and the layers, a tall, clear glass is essential. It showcases the dark coffee through the ice and the thick pink crown.
Square Ice Cube Molds: Standard ice melts too quickly and looks messy. Large, clear square ice cubes provide the structural support the foam needs to stay elevated.
Mastering the Emulsion: A Step-by-Step Guide
Step 1: Preparing the Strawberry Base
In a small chilled glass or frothing pitcher, combine your heavy whipping cream (1/2 cup / 120ml) and milk (1/4 cup / 60ml). The temperature is crucial; the colder the dairy, the more stable the air bubbles will be.
Whisk in the strawberry syrup (2 tbsp / 30ml) and half of the strawberry powder. You will see the liquid turn a beautiful, uniform pastel pink. This is the stage where you ensure all flavor components are fully integrated before aeration begins.
Step 2: Aerating for Stiff Peaks
Submerge the head of your electric frother just below the surface of the liquid. Turn it on and tilt the glass slightly to create a vortex. As the mixture begins to thicken, move the frother up and down slightly to pull more air into the cream.
Continue frothing for about 30-45 seconds. You are looking for a “velvety texture” that has doubled in volume. Stop once you see the foam holding its shape—when you lift the frother, the foam should form a peak that doesn’t immediately collapse.
Step 3: The Cold Brew Foundation
Fill your tall glass with large, clear square ice cubes. Pour your dark cold brew coffee (12 oz / 355ml) over the ice, leaving about 2 inches (5cm) of space at the top. You want the coffee to be chilled so it doesn’t melt the foam from the bottom up.
If you prefer a sweeter base, you can stir in a little vanilla syrup to the coffee now, much like you might do before topping a perfect chocolate chip cookie with a glass of milk.
Step 4: The Perfect Layered Pour
Slowly pour or spoon the Strawberry Cold Foam onto the surface of the coffee. Because of the density we created, it should sit prominently on top without bleeding into the dark coffee base.
Use the back of a spoon to gently swirl the top of the foam, creating those artisanal ridges and peaks. This creates the “macro food photography” look that makes the drink so appealing.
Step 5: The Final Forensic Touches
Garnish the top with a generous dusting of the remaining deep red freeze-dried strawberry powder. The tiny specks provide a beautiful color contrast against the pastel pink foam.
Allow the glass to sit for a moment until light droplets of condensation form on the vessel. This signifies the drink is perfectly chilled and ready to be enjoyed.
Pro-Level Barista Secrets for Strawberry Success
- Chill Your Tools: Place your frothing pitcher and the heavy cream in the freezer for 5-10 minutes before starting. Cold molecules bond better, resulting in a stiffer foam.
- Powder vs. Syrup: While syrup provides the sweetness, the freeze-dried powder provides the “specks” and acidity. Never skip the powder if you want that professional, textured look.
- Watch the Bleed: If your foam starts sinking into the coffee immediately, your dairy ratio is likely too heavy on the milk. Increase the heavy cream next time to boost the fat content and buoyancy.
- Balanced Pairings: This sweet topping goes beautifully with a savory breakfast. Try it alongside our hearty overnight oats for a balanced start to your day.
Maintaining the Foam’s Integrity: Storage and Prep
Strawberry Cold Foam is best enjoyed immediately. The aeration begins to dissipate after about 15-20 minutes, leading to a loss of those beautiful stiff peaks. However, you can prep the liquid base (cream, milk, syrup) up to 24 hours in advance and store it in the refrigerator.
Simply froth the chilled mixture right before you are ready to serve. Do not attempt to freeze the foam, as the expansion of water crystals will destroy the delicate bubble structure, leaving you with a grainy texture once thawed.
What to Serve With Your Strawberry Cold Brew
Since this drink is a treat in itself, it pairs wonderfully with both sweet and savory items. The fruity notes of the strawberry complement baked goods perfectly. Consider serving it with a creamy banana pudding oats bowl for a double-dose of fruit-forward breakfast joy.
If you are serving this as an afternoon pick-me-up, it provides a lovely contrast to a rich chocolate snack. The acidity of the strawberry cuts through the cocoa beautifully, making it a sophisticated companion for your favorite dessert.
Frequently Asked Questions
You can use a reduced puree made from frozen strawberries, but for the ‘speckled’ visual look and intense flavor without extra moisture, freeze-dried strawberry powder is superior.
Yes, but you must use a ‘Barista Edition’ oat or soy milk. Regular almond milk often lacks the protein and fat required to hold stiff peaks like dairy cream does.
When made correctly with heavy cream, the foam will maintain its structural integrity for about 15-20 minutes before it slowly begins to incorporate into the coffee.
This usually happens if the foam isn’t thick enough. Ensure you are using heavy whipping cream with a high fat content and frothing until stiff peaks form. If the foam is too liquid, it will sink.
The Ultimate Strawberry Cold Foam Recipe
Strawberry Cold Foam: The Ultimate Creamy Pink Cold Brew Topping
Ingredients
Equipment
Method
- In a chilled frothing pitcher, combine 1/2 cup (120ml) heavy cream, 1/4 cup (60ml) milk, 2 tbsp (30ml) strawberry syrup, and 1/2 tsp (1g) strawberry powder.
- Insert the milk frother wand and aerate for 30-45 seconds until the foam is dense and velvety, forming stiff peaks that hold their shape.
- Fill a tall glass with clear square ice cubes and pour in 12 oz (355ml) of dark cold brew coffee.
- Spoon the strawberry foam onto the coffee. Dust with the remaining 1/2 tsp (1g) of freeze-dried strawberry powder and serve immediately.
Notes
Use a high-quality strawberry syrup for the best pastel pink color.
Closing & Call to Action
Creating a café-quality Strawberry Cold Foam at home is a simple way to elevate your coffee routine into a luxurious experience. The combination of dense, pastel pink foam and dark, bold cold brew is a masterclass in culinary contrast. By focusing on the temperature of your dairy and the quality of your strawberry components, you can achieve professional results every time.
If you loved this recipe, please leave a comment below and tell us how your foam turned out! Don’t forget to share your beautiful creations and follow us on Pinterest for more visual recipe inspiration.