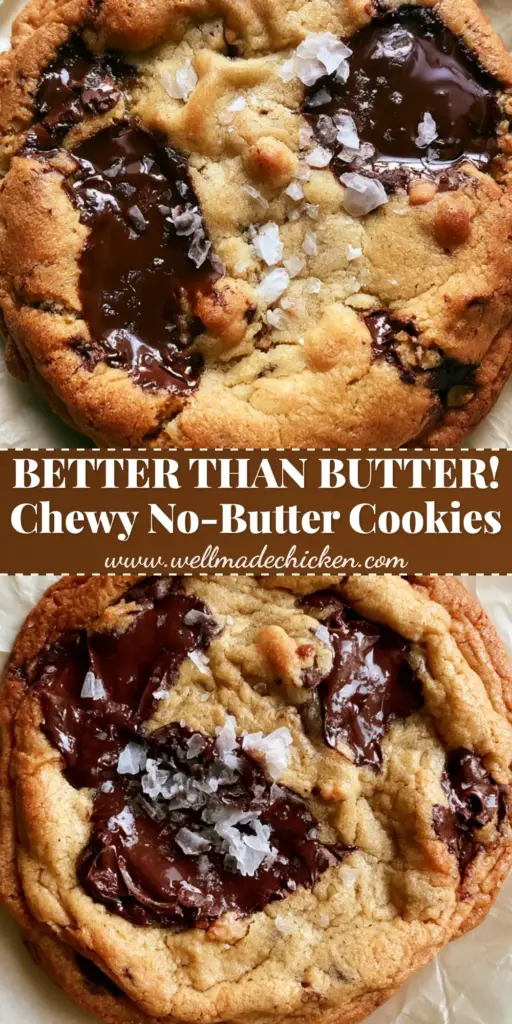
There is a specific, undeniable magic in a cookie that defies the traditional dairy-heavy norms. These no butter chocolate chip cookies are not merely a substitute for the classic version; they are a culinary revelation designed for those who crave a specific architecture of texture. Imagine a cookie with edges so thin and lacy they snap like delicate toffee, transitioning into a center that is thick, pale gold, and remarkably soft.
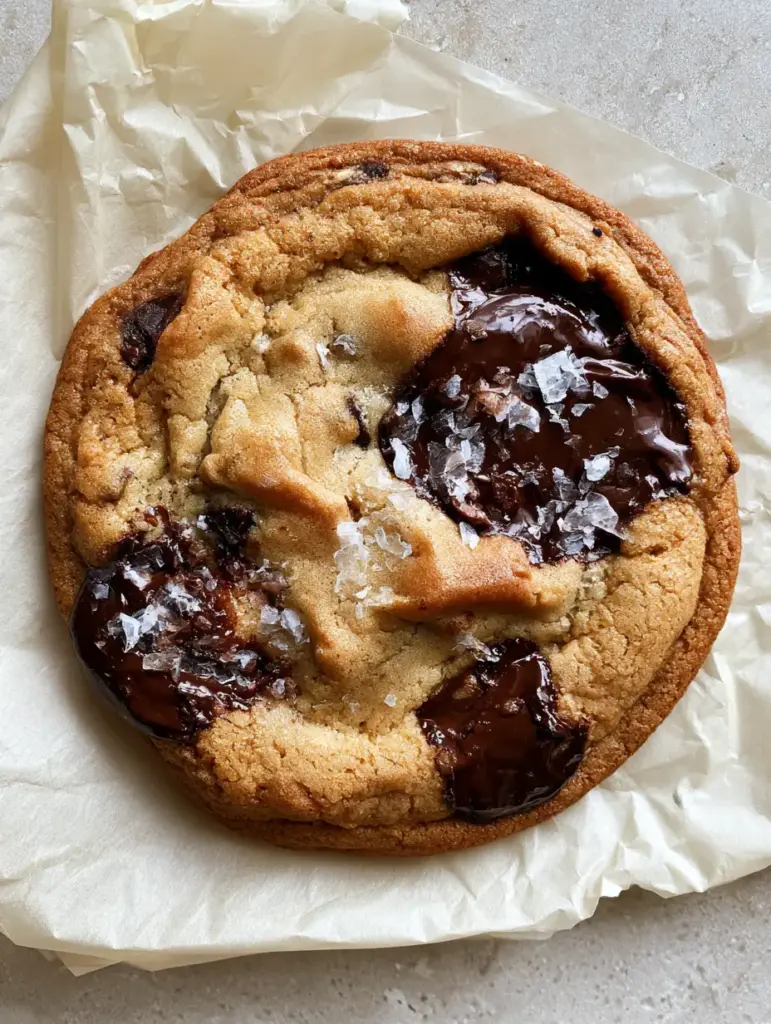
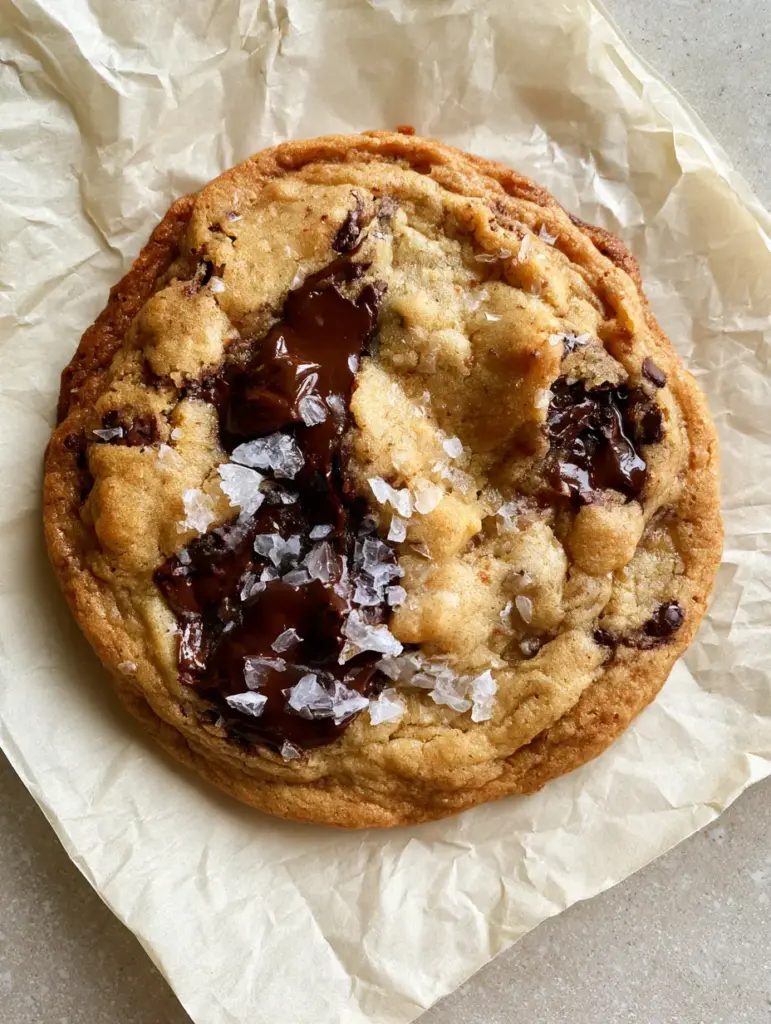
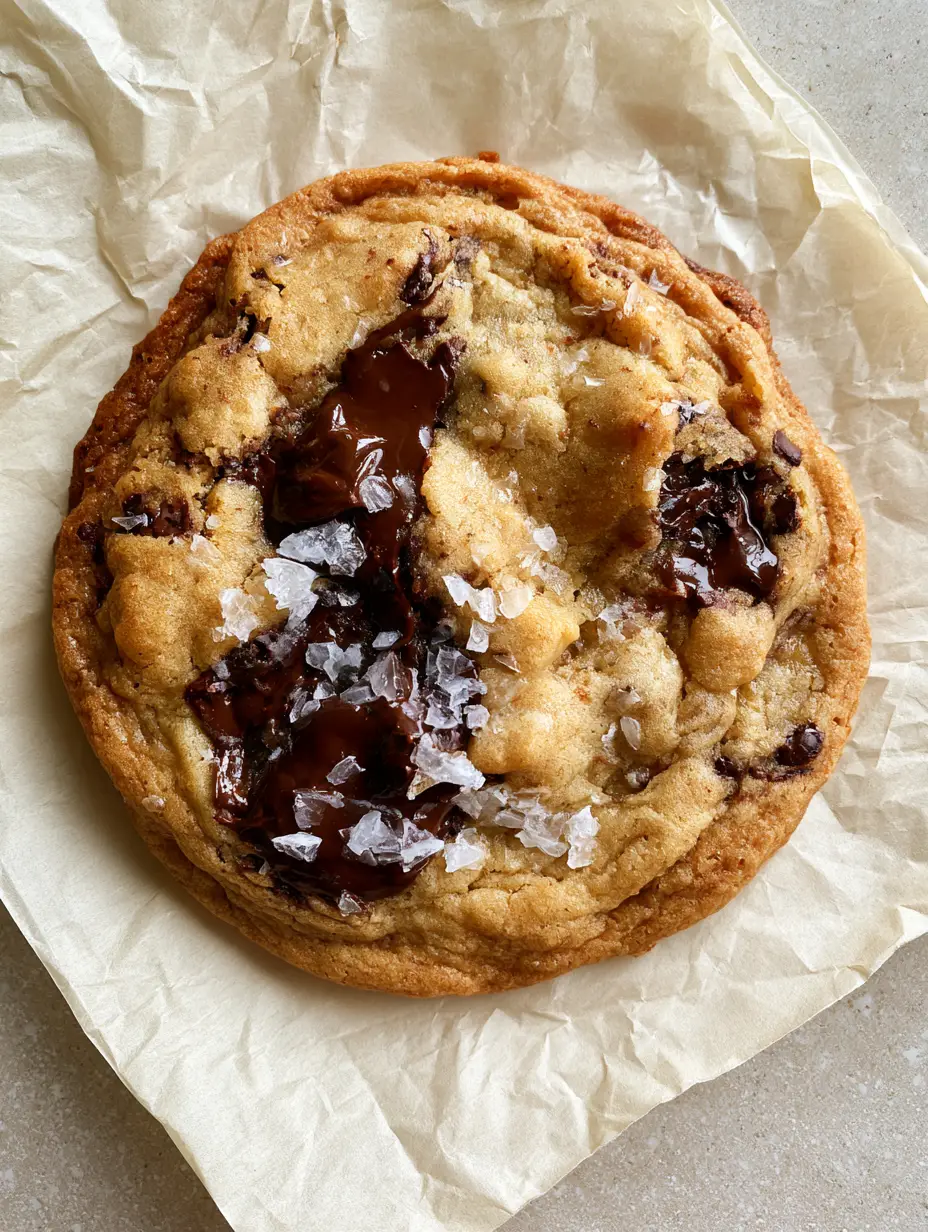
The visual appeal is the first thing you will notice. As the morning window light hits the surface, it catches a distinct, glistening oily sheen that butter simply cannot replicate. Large, liquid pools of melted dark chocolate nestle within deep, crinkled dough ripples, all topped with the crystalline structure of oversized flaky Maldon sea salt. This is a high-end bakery aesthetic achieved right in your own kitchen using simple pantry staples.
Whether you are out of butter or intentionally seeking that signature oil-based chew, this recipe delivers a professional-grade result. Unlike standard recipes, we leverage the science of fat-to-sugar ratios to ensure these cookies don’t just taste better—they look like a work of art. If you have enjoyed our homemade chocolate chip cookies recipe in the past, you will find this oil-based variation offers a unique, sophisticated profile that is entirely its own.
Why You Will Obsess Over These No Butter Chocolate Chip Cookies
- The Texture Gradient: You get the best of both worlds with golden-brown lacy edges that provide a crunch, leading into a visibly soft, rippled center.
- Glistening Chocolate Pools: By using chopped dark chocolate bars instead of chips, we create large, molten reservoirs of cocoa that stay gooey long after baking.
- Pantry-Friendly Sophistication: No need to wait for butter to soften; the use of neutral oil means you can satisfy a craving the moment it strikes.
- The Perfect Salt Balance: The generous dusting of flaky Maldon sea salt cuts through the richness, highlighting the deep notes of the dark chocolate.
The Science Behind the Ingredients for Oil-Based Cookies
Every ingredient in these no butter chocolate chip cookies serves a structural and visual purpose. Because we are removing the water content found in butter, we must balance the moisture and fat differently to achieve that “ultra-chewy” result seen in our NYC cookies style.
Neutral Vegetable Oil: 3/4 cup (180ml). Oil provides 100% fat content without the water found in butter, resulting in a more tender crumb and that signature glistening surface described in the visual blueprint.
Granulated Sugar: 3/4 cup (150g). This is the key to those lacy, golden-brown edges; white sugar caramelizes at high heat, providing the necessary structural crispness.
Packed Brown Sugar: 3/4 cup (150g). The molasses in brown sugar is what creates the “pale gold” color and the “ultra-chewy” center, keeping the dough moist and pliable.
Large Eggs: 1 whole egg plus 1 egg yolk. The extra yolk adds lecithin and fat, which acts as the emulsifier that binds the oil and sugars together, preventing a greasy finish.
All-Purpose Flour: 2 1/4 cups (280g). This provides the canvas for our ripples; it is just enough to hold the structure without making the cookie cakey or dry.
Baking Soda: 1 tsp (5g). This is essential for the browning process, helping the edges reach that perfect mahogany hue while creating the carbon dioxide bubbles that lead to ripples.
Dark Chocolate Bars (70% Cacao): 8 oz (225g), roughly chopped. Do not use standard chips; chopping a bar ensures those “large, glistening pools” of melted chocolate that define the high-end blog aesthetic.
Maldon Flaky Sea Salt: 1 tbsp (15g). These oversized crystals are not just for flavor; they provide the visual “glistening” contrast against the dark chocolate pools.
Essential Equipment for Professional Results
To achieve the “top-down, handheld smartphone photo” look, you need the right tools. A heavy-duty baking sheet is non-negotiable to ensure even heat distribution for the lacy edges. You will also need crumpled off-white parchment paper, which prevents sticking and adds that authentic, unedited texture to your final presentation.
An oversized cookie scoop (approximately 3 tbsp or 45ml capacity) is vital for creating those “oversized” cookies. Finally, a wire cooling rack is necessary to stop the cooking process immediately, preserving the “soft-baked” integrity of the center while the edges set.
Step-by-Step Instructions to Achieve Visible Texture
Creating the Oil and Sugar Emulsion
In a large mixing bowl, whisk together 3/4 cup (180ml) of neutral oil, 3/4 cup (150g) granulated sugar, and 3/4 cup (150g) packed brown sugar. Whisk vigorously for at least 2 minutes; you are looking for the sugars to begin dissolving into the oil, creating a thick, grainy slurry. Add the whole egg, the extra yolk, and 2 tsp (10ml) of vanilla extract, whisking until the mixture is slightly lightened in color and smooth.
Folding for Maximum Ripples
Sift in 2 1/4 cups (280g) all-purpose flour, 1 tsp (5g) baking soda, and 1/2 tsp (3g) fine sea salt. Use a rubber spatula to fold the dry ingredients into the wet just until a few streaks of flour remain. Over-mixing at this stage will destroy the “visibly soft” texture and make the cookies tough. If you’ve mastered brownie cookies, you know that gentle folding is the secret to a fudgy interior.
Incorporating the Dark Chocolate Pools
Add your 8 oz (225g) of roughly chopped dark chocolate chunks. Ensure you include the “chocolate dust” from the cutting board, as this creates a marbled look within the dough ripples. Fold gently until the chunks are evenly distributed. The dough will appear more glistening and oily than a butter-based dough; this is exactly what we want for that final sheen.
Baking for Lacy Edges and Crinkled Centers
Preheat your oven to 350°F (175°C). Scoop oversized mounds of dough (about 3 tablespoons each) onto your parchment-lined sheets, leaving at least 3 inches (7.5cm) between them to allow for the lacy spread. Bake for 10-12 minutes. Pro Tip: At the 8-minute mark, lift the baking sheet and gently bang it against the oven rack. This “pan-banging” technique is what creates those iconic crinkled dough ripples and pushes the chocolate into glistening pools.
The Finishing Visual Touches
Remove the cookies when the edges are deep golden-brown but the centers still look slightly underdone and pale gold. While the chocolate is still molten, immediately sprinkle a generous dusting of oversized flaky Maldon sea salt over the top. The heat will cause the salt to adhere to the glistening oil-based surface, creating the perfect handheld smartphone photo aesthetic.
Expert Tips for Success
- Don’t Skimp on the Whisking: Since oil doesn’t aerate like butter, the initial whisking of the oil and sugar is your only chance to build the structure that supports the ripples.
- Use High-Quality Chocolate: Because these cookies have a clean, neutral fat base, the flavor of the chocolate is front and center. Use a bar you would enjoy eating on its own.
- The Parchment Trick: Crumple your parchment paper into a ball and then straighten it out before lining your pan. This creates more airflow under the cookie and adds to the rustic visual appeal.
- Wait for the Set: These cookies are extremely soft when they first come out. Let them sit on the hot pan for at least 5 minutes to allow the lacy edges to firm up before moving them.
Storage, Reheating, and Freezing Advice
These no butter chocolate chip cookies actually stay soft longer than butter-based cookies because oil remains liquid at room temperature. Store them in an airtight container for up to 5 days. If the chocolate pools have firmed up, a quick 5-10 second blast in the microwave will restore that glistening, gooey texture.
To freeze, scoop the dough into balls and freeze on a tray before transferring to a zip-top bag. You can bake them straight from frozen; just add 2 minutes to the total baking time. This is a great way to always have a high-end dessert ready, much like keeping a chocolate cream cheese danish in the freezer for unexpected guests.
What to Pair With These Ultra-Chewy Cookies
These cookies are rich and decadent, making them the perfect partner for a cold glass of almond milk or a bold espresso. If you are serving these as part of a larger brunch or dessert spread, they contrast beautifully with fresh, vibrant flavors. Consider serving them after a meal of zucchini lasagna to keep the evening feeling light but satisfying.
For a complete “blog-ready” spread, pair these cookies with a refreshing beverage from our juice recipes collection. The acidity of a fresh green juice or a tart berry blend provides a sophisticated counterpoint to the deep dark chocolate and flaky salt of the cookies.
Frequently Asked Questions
Yes, you can use a light olive oil or even a high-quality extra virgin olive oil for a subtle fruity note. However, ensure it is a neutral-tasting oil if you want the dark chocolate to be the primary flavor profile.
Unlike butter-based recipes, this oil-based dough does not require chilling. You can bake it immediately, making it the perfect quick-fix recipe for sudden cravings.
Avoid standard chocolate chips, which contain stabilizers to help them keep their shape. Use a high-quality dark chocolate bar and chop it into irregular chunks to achieve those molten, glistening pools.
Oil-based cookies naturally spread more than butter-based ones. If they spread excessively, ensure your oil-to-sugar emulsion was whisked long enough and that your flour measurements were precise using the spoon-and-level method.
The Best No Butter Chocolate Chip Cookies Recipe
No Butter Chocolate Chip Cookies: The Ultimate Ultra-Chewy Oil-Based Recipe
Ingredients
Equipment
Method
- Whisk oil, granulated sugar, and brown sugar in a large bowl for 2 minutes until a thick slurry forms.
- Beat in the egg, egg yolk, and vanilla until the mixture is smooth and slightly pale.
- Sift in flour, baking soda, and fine salt. Fold with a spatula until just combined, then fold in chopped dark chocolate.
- Scoop 3-tbsp mounds onto parchment. Bake at 350°F (175°C) for 10-12 minutes, banging the pan against the rack at the 8-minute mark to create ripples.
- Remove when edges are golden and centers are pale. Immediately dust with Maldon sea salt while chocolate is molten.
Notes
The pan-banging technique is essential for the crinkled texture.
Share Your Glistening Cookie Creations!
We want to see your ultra-chewy results! Did you get those perfect crinkled ripples? Take a top-down smartphone photo of your masterpiece and tag us. If you found this guide to no butter chocolate chip cookies helpful, be sure to save it to your “Baking Inspiration” board on Pinterest so you never lose the secret to those lacy edges.
Leaving a comment below helps our community grow, and subscribing to our newsletter ensures you never miss a visually stunning, scientifically-backed recipe. Happy baking!